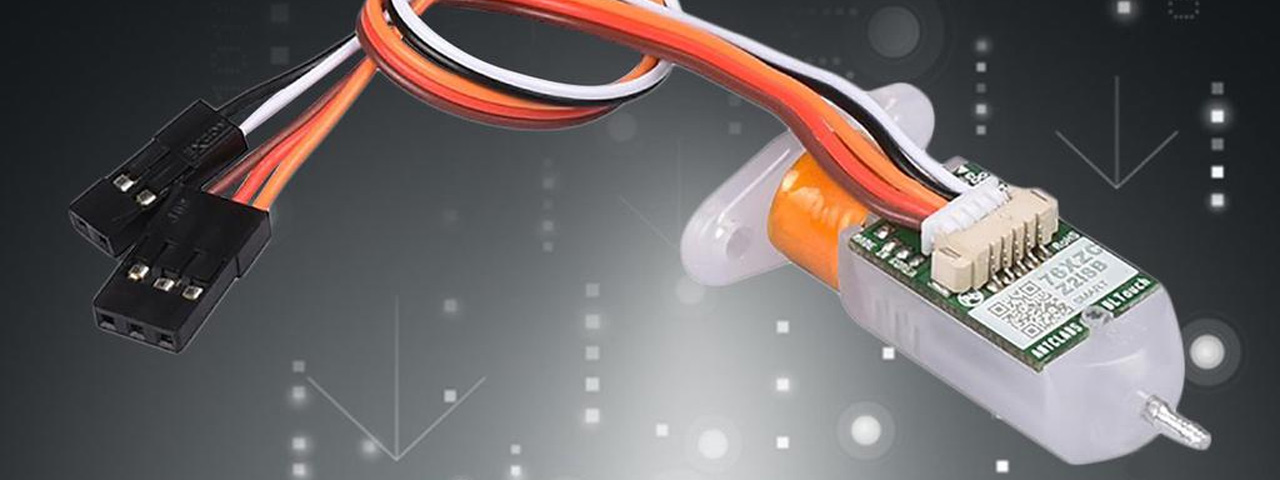
Auto Bed Leveling (ABL) is a key feature in most modern 3d printers. If your printer doesn’t have it or if you are not happy with how it performs, adding a BLtouch probe for ABL is the way to go. The BLtouch sensor is a universal solution for reliable ABL. Its performance doesn’t depend on the build surface or the environmental conditions (humidity, temperature).
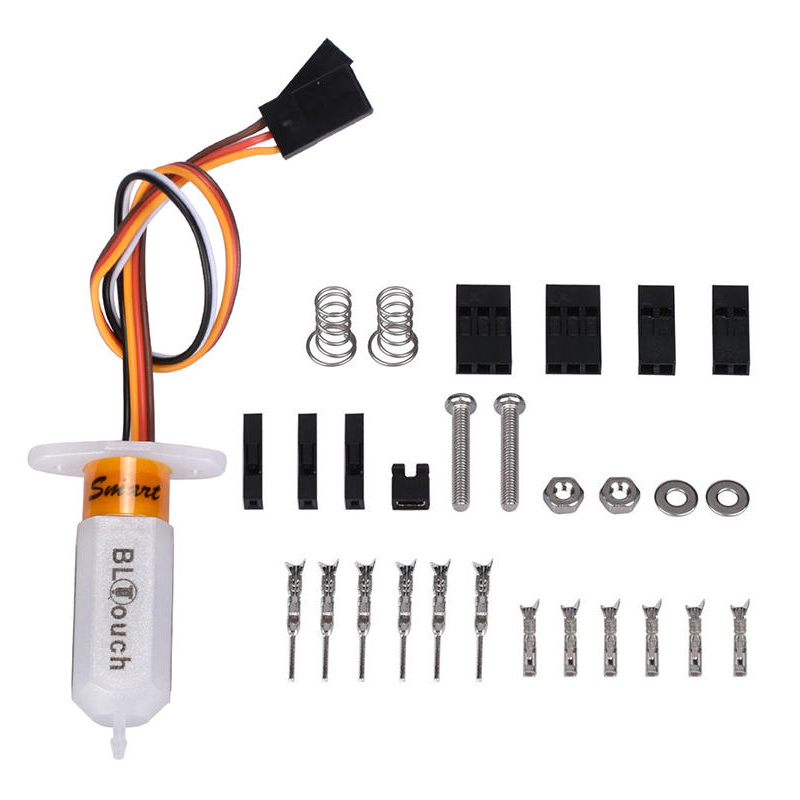
BLtouch – unboxing
The BLtouch sensor comes in a small package containing the probe, mounting screws with springs to adjust the position of the sensor, and elements to build all needed male and female Dupont connectors. The integrated wires are very short and you will need these additional connectors to make extension cable for connection to your control board. If you don’t want to build your own cable you can buy a set with an extension cable included.
BLtouch – installation
The installation of BLtouch is in 3 steps:
- Mount the sensor on your print head;
- Wiring to the control boards;
- Firmware settings (Marlin).
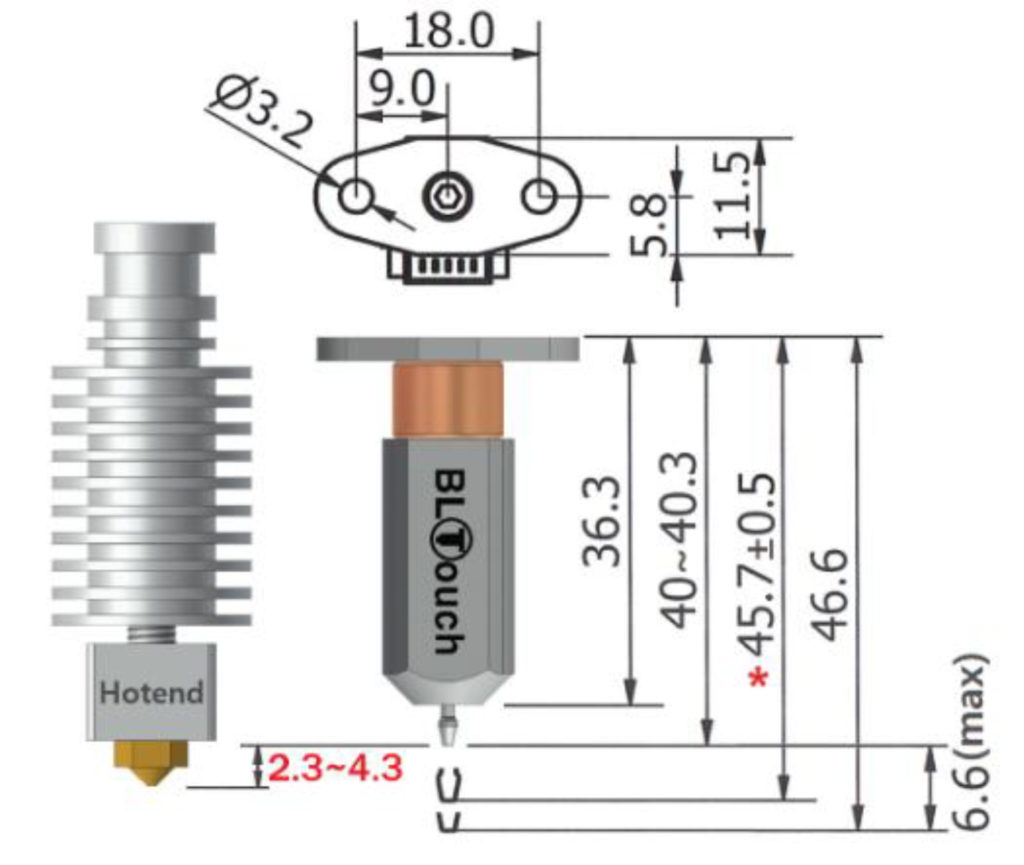
In order to attach the probe to your print head you will need to print a mount. If you are using a stock print head, there is a chance you find a mount for your printer on Thingiverse. If using a custom print head, you’ll have to design your own mount.
BLtouch – wiring to SKR 32-bit board
Wiring to an SKR 32-bit control board is a bit different for SKR V1.3 and SKR V1.4 versions. The newer V1.4 comes with dedicated connectors for BLtouch. For the SKR V1.3 the BLtouch is connected to the servo output.
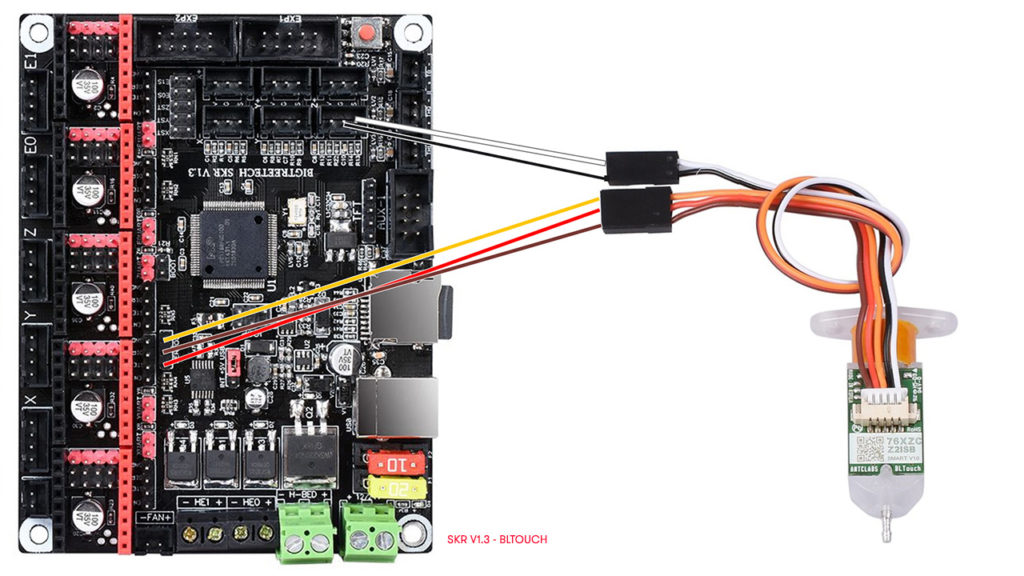
The connection to the SKR is easy – no need of a pin 27 adapter like with some stock boards. Connect the 2 wires to the Z min instead of the stock limit switch. The 3 wires connector goes to the SERVO output. The only modification in the wiring is to switch the places of the brown and the red pins, because of the layout of the servo connector.

The BigTreeTech SKR V1.4 board has the servo and the probe pins together. No need to switch the red and the brown wire – the connection is straightforward.
Buy the SKR V1.4
BLtouch – Marlin 2.0 configuration
My editor for Marlin is Atom. All modifications to enable BLtouch to take place in two files – Configuration.h and Configuration_adv.h
Let’s start with Configuration.h
Press Ctrl F to search and type bltouch. Find //#define BLTOUCH and uncomment that line by removing the 2 slashes in the beguining. This activates the probe.
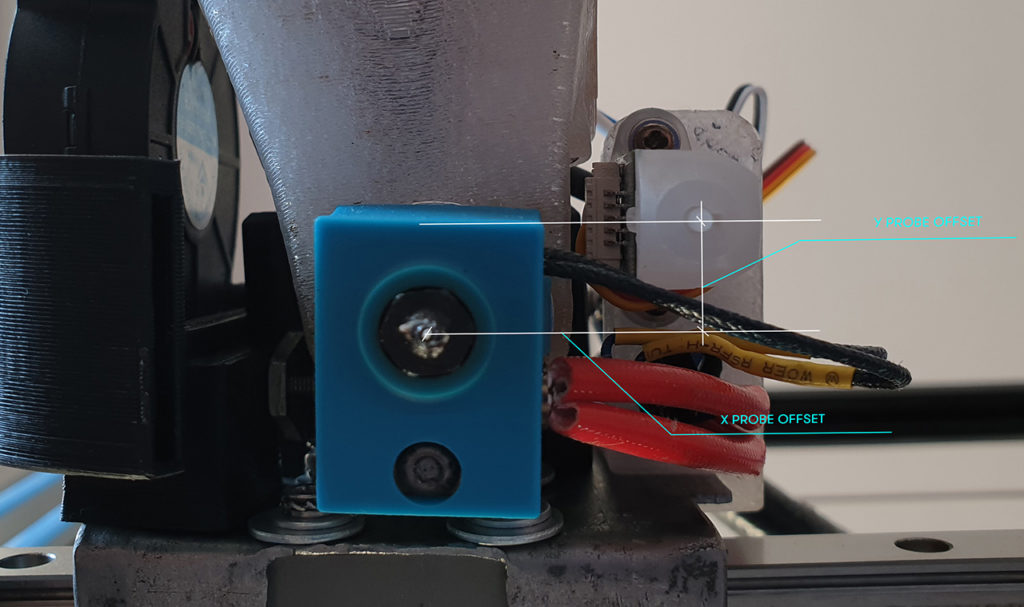
Next search for x_probe_offset. You’ll find 3 important lines to edit with specific values for your setup (check the video above). The X, Y, and Z offsets define the position of the BLtouch probe to the nozzle. X and Y offsets are in millimeters and can be positive or negative, depending on the situation of the probe – right, left, front, or back from the nozzle.
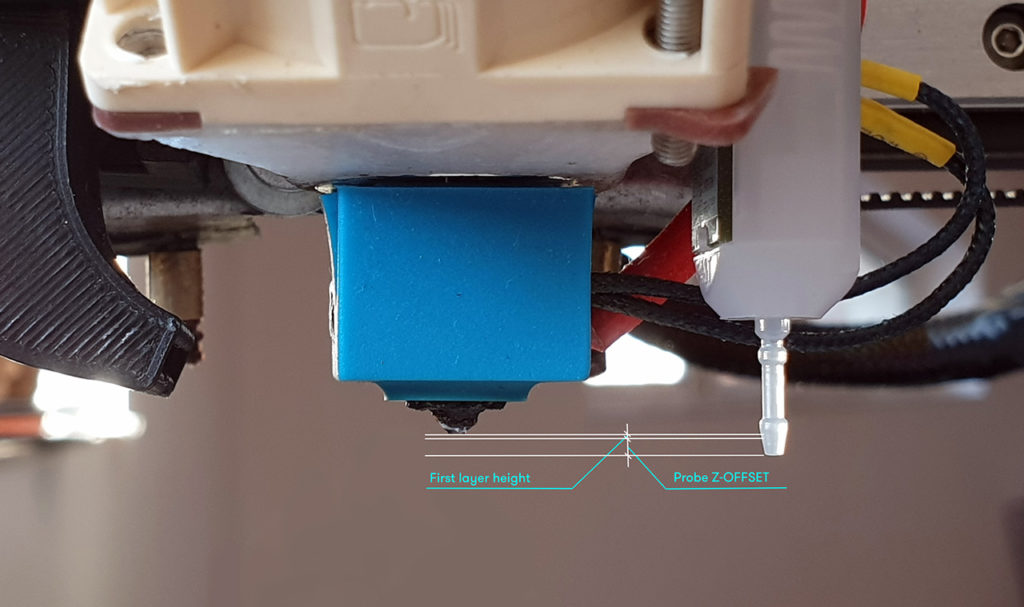
So in Marlin, you can leave the Z offset at 0 or enter some safe negative value just in case.
Search next for min_software and comment #define MIN_SOFTWARE_ENDSTOP_Z. It allows setting a negative Z offset.
Find bilinear and uncomment #define AUTO_BED_LEVELING_BILINEAR. This defines a rectangular grid for probing.
Next activate the #define Z_SAFE_HOMING – it will home the print head in the center instead of the corner.
Activate the #define ENDSTOPPULLUP_ZMIN_PROBE and change the value of #define Z_MIN_PROBE_ENDSTOP_INVERTING to true.
Finally, you may want to uncomment also #define Z_MIN_PROBE_USES_Z_MIN_ENDSTOP_PIN (for SKR V1.3) and #define NUM_SERVOS 1
Now we’ll edit the Configuration_adv.h file. Most of the edits here are optional and give you added safety and control. For example, you can get an additional BLtouch voltage menu on your display or you can enable the BLtouch 5V mode on startup if your control board supports it. I didn’t find this particular point in the SKR board documentation, so I tested the 5V mode and it worked fine, meaning the SKR board is 5V tolerant.
For safety reasons, I increased the minimum command delay to 500ms and I forced the SW mode that makes the output pulses longer.
Here is a summary of my edits:#define BLTOUCH_DELAY 500 (optional)#define BLTOUCH_FORCE_SW_MODE (optional)#define BLTOUCH_SET_5V_MODE (for BLtouch V3.0+)#define BLTOUCH_LCD_VOLTAGE_MENU (optional)#define BABYSTEP_ZPROBE_OFFSET#define BABYSTEP_MULTIPLICATOR 10 (faster probing)
Additional Marlin settings for the ABL mesh
The default grid for ABL probing in Marlin is 9 points (3 lines x 3 columns. You can change the grid to more points in Marlin, though I find the default 9 points mesh good enough. To change the number of grid points look for #define GRID_MAX_POINTS_X in Configuration.h
There are also settings for the left, right, front and back boundaries of the probing in order to avoid the paper clips. Search for #define LEFT_PROBE_BED_POSITION in Configuration.h to find those settings.
BLtouch – slicer configuration
After successfully flashing the modified firmware on your board you have to include the G29 command in the startup gcode in your slicer profile in S3D or Cura. The G29 command will generate the bed leveling mesh before every print. Check the video above for my startup gcode.
BLtouch – final thoughts
Adding a BLtouch probe to your 3d printer is a great upgrade, that helps to get a perfect first layer. Is it better than inductive and capacitive sensors? Yes, in many cases it is, especially if you print on different build surfaces if your build surface deforms when heated or if your environmental conditions are not constant. In the end, seeing and touching is better than just seeing, right?