I am really tired of replacing inductive probes on my Voron 2.4. I don’t know what is happening. Either they can’t support the heat of the Voron 2.4 bed or the quality of these probes has decreased. I use the same Omron sensors on my CR10 for 2 years and on my Voron Switchwire for a year and they work fine, but on the Voron 2.4 I have to replace the inductive probe every few weeks. It fails. This becomes expensive to maintain printer and I decided to give the Klicky probe a chance.
So, what is the Klicky probe? It’s a mechanical probe, that attaches automatically to the printhead with magnets and probes the bed. In the case of Voron 2.4, it is used for gantry leveling and for z endstop.
The concept is not new, but the Klicky probe is specifically developed to fit in the Voron Afterburner toolhead and to replace easily the original proximity sensor.
Before the print job, it detaches automatically from the printhead. It uses a micro limit switch – the same type as those used in endstops.
The Klicky probe is developed by JosAr – project page on GitHub.
Klicky probe benefits
The main advantage of implementing Klicky probe is to master the cost of the bed probing/QGL on Voron 2.4, which is an essential function on this 3d printer. After the first investment in probe parts (around $15), its maintenance should be very cost-efficient.
How much could it be? Replacing the limit switch if probing tolerance gets worst? It was about $1. Replacing the limit switch is also much less time-consuming than replacing and rewiring a new inductive probe.
The second main benefit is the limitless types of build surfaces I can now use. The Klicky probe is a pure mechanical sensor (like a simplified BLtouch) and it will work fine with any surface – glass, borosilicate glass, or my favorite one – the PC sheet.
Klicky probe – parts
To build such a probe you will need to print and buy few parts:
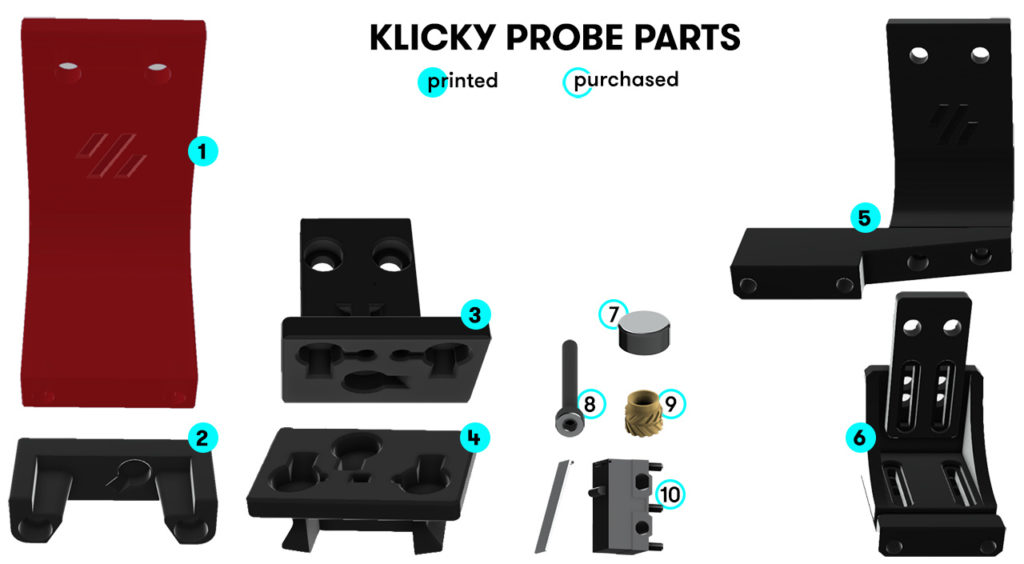
- Dock base – installation on the back 2020 extrusion of the gantry with 2 x M5x10 screws and 2 x T-nuts
- Probe dock – installs on the dock base with 2 x M3x20, needs 1 magnet
- Afterburner mount – easy replacement for the original inductive sensor, needs 3 magnets and 2 x M3x16
- Probe – needs 4 magnets, micro limit switch, 2 x M2x10 self-tapping screws
- Optional – alternative dock base if you use purge bucket
- Optional – adjustable dock base – allows adjusting the probe position in case of not standard configurations. Myself, I use an electronic hall effect endstop and that would be the best base to use because the standard one is designed for a limit switch endstop. However, I went with the standard one, because I like its look better and I increased with few millimeters its length in the slicer, to get in the range of the hall sensor.
- Neodymium magnets 7 x 6×3
- Screws:
- 2 x M5x10
- 2 x M3x20
- 2 x M3x16
- 2 x M2x10 self-tapping
- 2 x M5 T-nuts for 2020 extrusion
- Threaded heat plastic inserts 2 x (M3 x D5.0 x L5.0)
- Micro limit switch – Omron D2F-01L or D2F-5L (the lever has to be removed)
Regarding the magnets, I used standard 80 °C neodymium magnets 6×3 for the dock and the probe.
For the printhead mount, I used 3 x 150 °C high-temperature neodymium magnets 6×5 (I couldn’t find 6×3 HT magnets). I believe the AB mount magnets should withstand at least 120 °C, because in the case of large parts they will stay close to the bed for a long time. Unfortunately, I couldn’t find HT magnets on Aliexpress and I bought them from Magsy.
Here is a modified AB mount to host 6×5 magnets.
Klicky probe – basic setup
With Klicky, you can go basic or advanced. The basic setup consists in:
- Build and Install the probe
- Measure its position
- Edit klicky-probe.cfg and printer.cfg files
- Test the probe operation
For all these steps, please refer to the video above. Here is my print_start code:
[gcode_macro PRINT_START]
#   Use PRINT_START for the slicer starting script - please customise for your slicer of choice
gcode:
	G28 X Y			; home X Y
	Attach_Probe_Lock
        G28 Z                   ; home Z
	G1 Z20 F3000            ; move nozzle away from bed
	QUAD_GANTRY_LEVEL
	G28			; home XYZ
	Dock_Probe_Unlock
I use this minimal code, when no bed mesh is performed.
Klicky probe – advanced setup
The advanced setup includes automatic Z calibration and bed mesh.
TBH, I wasn’t interested in implementing automatic Z calibration, because I don’t see major benefits vs. defining manually the Z offset. Bed mesh on Voron 2.4 is also something I considered to be mainly a diagnostic tool than used for dynamic compensation of a warped hotbed. The main operational principle of V2.4 was the bed should be absolutely flat and everything else should work based on this assumption. However these advanced techniques are trendy now, and this review won’t be complete without them.
Video coming soon.
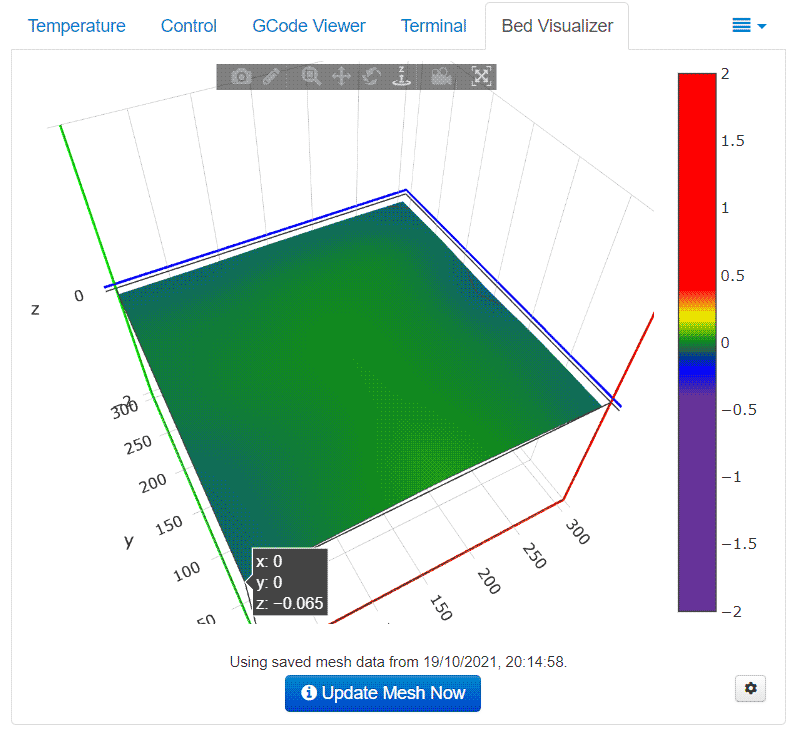
The max deviation is 0.065 mm
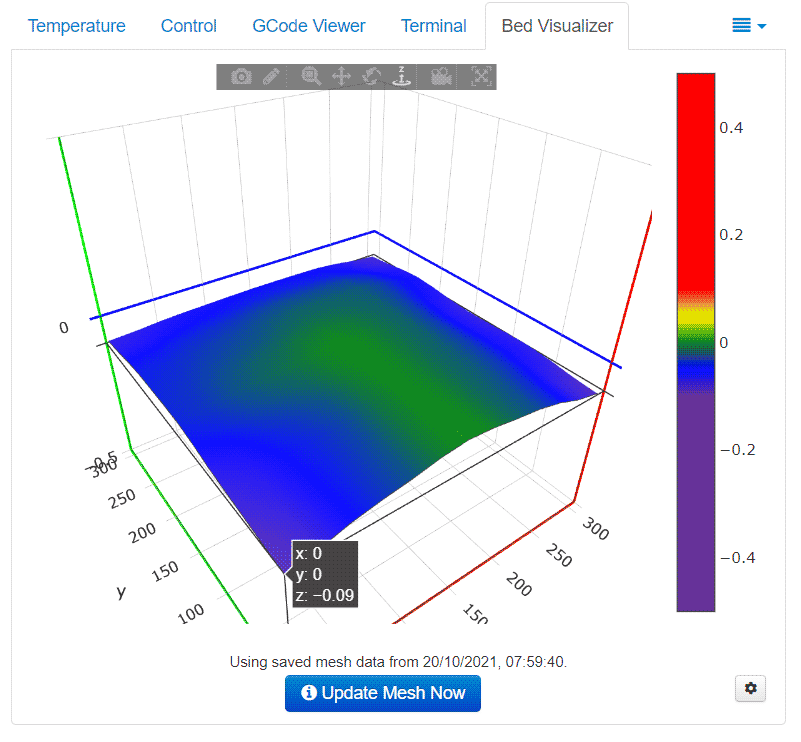
The max deviation is 0.09 mm
My hotbed is relatively flat and within Voron standards, with max warping < 0.1 mm at 100 C.
I use the bed visualizer plugin in Octoprint for analysis.
In very rare cases only, when I have large prints, I use the bed mesh for compensating the warping. Here is my print_start code with Klicky probe and bed mesh:
[gcode_macro PRINT_START]
#   Use PRINT_START for the slicer starting script - please customise for your slicer of choice
gcode:
	BED_MESH_CLEAR
	G28 X Y			; home X Y
	Attach_Probe_Lock
        G28 Z                   ; home Z
	G1 Z20 F3000            ; move nozzle away from bed
	QUAD_GANTRY_LEVEL
	G28			; home XYZ
	BED_MESH_CALIBRATE
	Dock_Probe_Unlock
M32 is not used in these examples. I have all commands directly in the print_start, because it is more readable for me.
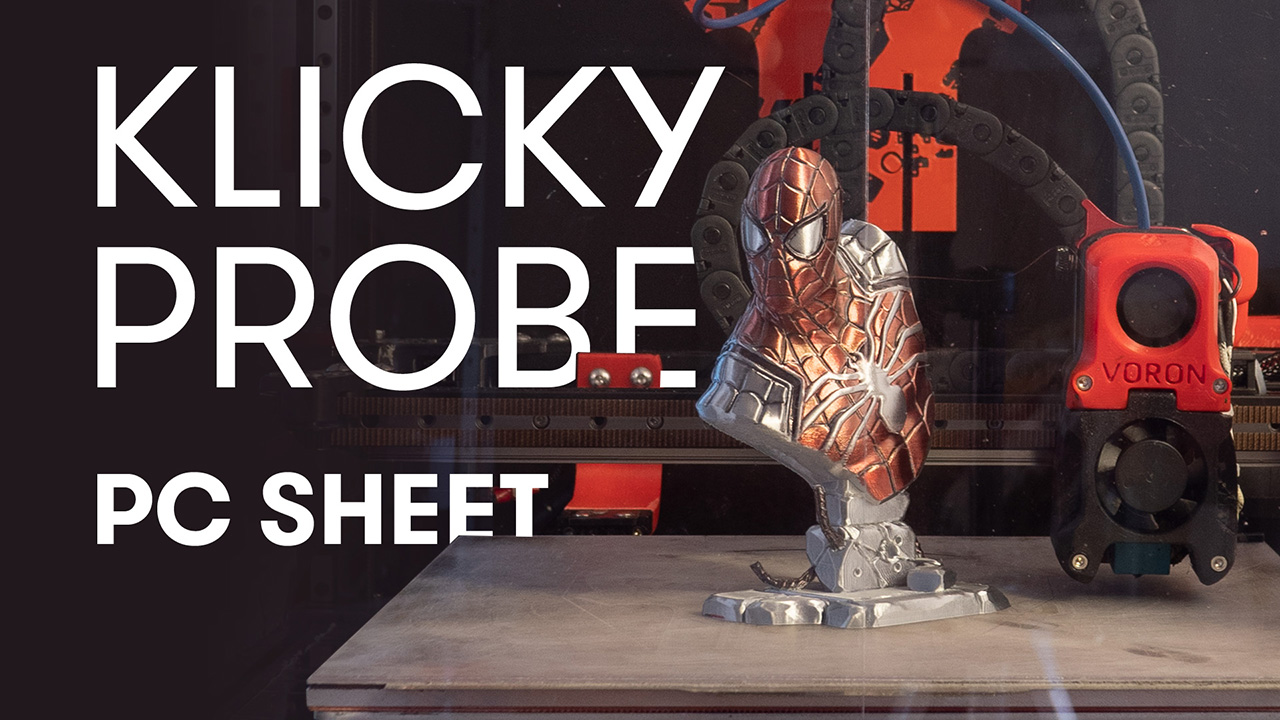
PC sheet build surface with Klicky
Parts used:
3M heat transfer sticker
Spring steel sheet
2mm thick PC sheet – sourced locally
Klicky Probe – conclusion
At the time of writing Klicky was a great alternative to failing inductive probes and it is still one of my preferred ABL probes. Its simplicity, reliability and ridiculously low cost compensate for slightly longer bed probing time.
In the time of ultra-precise ABL sensors and probes like the new Voron Tap or Creality’s CR-Touch it doesn’t provide the best absolute accuracy. However its accuracy is just enough to deliver a perfect first layer.